Create push keys on Bulloch POS
Create register buttons for fast-selling items

Written by Michael Cook
Updated at December 22nd, 2025
Table of Contents
This article shows you how to create a push key on the Bulloch register by linking it to an item PLU that was created and synced from XSite so you can speed up checkout and reduce entry errors at the register.
Before you begin
- The item must already exist in XSite.
- You must sync XSite before creating the push key on the Bulloch register.
- You need access to the Bulloch register where the push key will be created.
Steps
Create a push key using XSiteIO
- Go to Price Book in the side menu.
- Select Items, then select Items again.
- Click the [ + ] icon to add a new item.
- Enter the item details and allow the PLU to generate automatically.
- Write down the PLU number.
- Enable Prompt for price if the item needs a manual price at checkout.
- Click Save.
- Click [Sync] to send the item to Bulloch.
- Go to the Bulloch register.
- Press and hold the key position you want to use.
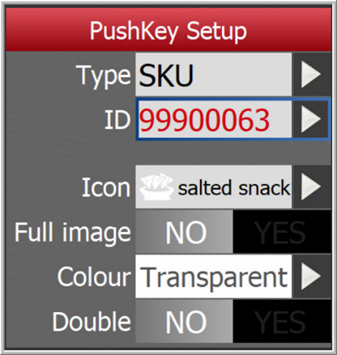
- Select SKU when prompted.
- Enter the PLU number from XSite.
- Save the key setup.
Create a push key using XSite Classic
- Go to Price Book in the side menu.
- Select Items.
- Click the [ + ] icon to add a new item.
- Enter the item details and allow the PLU to generate automatically.
- Write down the PLU number.
- Enable Prompt for price if the item needs a manual price at checkout.
- Click Save.
- Click [Sync] to send the item to Bulloch.
- Go to the Bulloch register.
- Press and hold the key position you want to use.
- Select SKU when prompted.
- Enter the PLU number from XSite.
- Save the key setup.
Tips & Warnings
- Always sync XSite before setting up the push key on the register.
- If the PLU is wrong, the push key will not work.
- Open-priced items must have Prompt for price enabled.
- If the item does not appear on Bulloch, wait a few minutes and sync again.
- Test the push key after setup to confirm it sells correctly.